Homemade Surfboard Rack
I took a break from doing all the home remodeling to do some space organizing for my condo. The single biggest thing that I need to address is to build a closet organization system for the master bedroom, so what do I do instead?… I build surf racks for my wall to make it look less empty.
After countless hours (approx 3-4 hours) of meandering online for DIY projects, ideas, and information on how to build a surfboard wall rack, I realized that there wasn’t really anything out there to my liking. People make some really goofy/tacky looking homemade junk and are somehow proud of it. Another thing was the cost, they kept it cheap at around $40-$50 in materials, but I wanted cheaper. Why? …because I’m really damn cheap.
Here are some that I found online which I just could not see myself making and putting up in my condo:


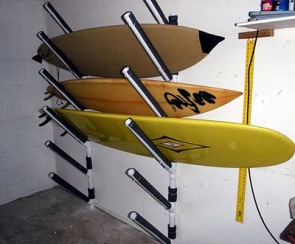
These are great if you move a lot or need something portable. I simply cannot afford to lose that much floor space
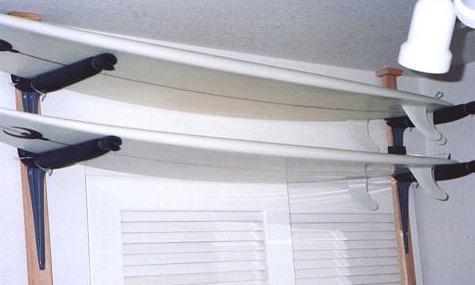
These just look too tacky for me. I would never put anything like this up in my place.

This is the one I would have liked to build if I was able to. It looks great to have a designated spot in your backyard for surfboards and wetsuit but unfortunately my backyard is shared with everybody else. I would actually recommend this one if you were able to do it.
So, many of the online DIY ideas are decent but most of them just aren’t my cup of tea. I did a little brainstorming and figured that I wanted a display rack to not only keep things organized and off the floor, but to keep things sexy as well. I went down to home depot and picked up a bunch of items and got to work. The following tutorial-of-awesome will hopefully help any fellow surfers out there who are looking for a simple, quick and cheap solution which looks great…not your Mickey Mouse quality surfboard rack that looks frumpy.

There you have it. My materials: 1/4″ Dowel, 3/4″ Dowel, some wood pieces for stair moulding?, wood blocks, 1.5″ and 2.5″ long wood screws, shelf lining, and a bottle of water to stay hydrated.


These 13″ long wood pieces were cut down to 12.5″


I marked center holes at the end of the wood pieces and the base. Then I drilled a hole through the base and 1″ into the wood piece.
Then I took a water break.


I cut the 3/4″ dowel to 1.5″ length and the 1/4″ dowel to 1.25″ length


Using my 1/4″ drill bit, I put holes at the rounded side of the wood piece and the 3/4″ dowel


Connect everything just like the lego-maniac you were in your youth. Use a little bit of glue to make sure they stick well.

This is what you should have so far

You will be attaching it through the base like this using the 1.5″ wood screws which should be easy if you drilled a pilot hole.


Now you have an army of brackets and the first glance of how it will look against the wall. I caulked the joints where all the wood pieces met up but this is optional I guess.

I painted the brackets to match my accent wall with the left over paint I had


I cut strips of the shelf liner to cushion my board against the bracket. They’re about 12″ long and 7/8″ wide. I also cut a little piece to go on the dowel.
DONE! Now you have to hang it evenly. I spaced out the brackets about 32″ because wall studs are typically located 16″ apart. You want to make sure you find the studs and mount the brackets to them.

Mounted the first set, they are level!
I used the level to find the spot under the first set so they lined up straight. The wall display racks came out rather nicely in my opinion:


There you have it, two surfboard wall display racks for $32 and some change from Home Depot. Comes out to $16 per set for a sick looking display rack for your froth bone collection. I even have some extra material left over for more racks that I plan on making in the near future (update: Need to buy more shelf liner after Mother stopped by last night and thieved it from me). I have enough dowels for 3-4 more sets which can save on cost when I decide to build more for my long board and guest boards for buddies to stay over.
Until next time…stay classy San Diego.


Hi,
Do you have the URL where you got the photo of the A-frame surfboard rack in the upper right-hand corner of this post?
I want to add a link to it on my own page (http://members.shaw.ca/kevin_bartlett_175/plyracks.html). I’ve already added a link to your surfboard rack design.
Cheers,
Kevin.
Kevin Bartlett
October 6, 2010 at 9:42 pm
Never mind. I see that the image source (http://www.derekdecker.com) is included in your html code.
Kevin.
Kevin Bartlett
October 12, 2010 at 8:14 pm
It’s flattering to see my surfboard rack/wetsuit hanger picture on someone else’s website! I am now in an area where others could easily take my board, so I was thinking about making something to hang my board inside. Thanks for the how-to!
Tram
June 2, 2011 at 10:56 am
Hey just wondering if u had a link on how to make the outside standup one with room to hang ur wettie looks awesome but having trouble finding good diy vertical racks. cheers
kirst
November 2, 2011 at 7:44 pm
kirst-
I also want to build the vertical all-in-one stand. Following Kevin’s advice, I checked the HTML code and tracked down this site:
http://blog.tramdang.com/2009/03/27/my-diy-locking-surfboard-rack/
Unfortunately, I don’t think there is any documentation on how it was built. .
Socks
January 16, 2012 at 11:33 am
hi i want to build the wet suit surf board rack what do i need
austin
April 6, 2012 at 1:36 pm
Racks look great. Surfboards could use stripping and new wax.
Coleman
April 9, 2012 at 6:59 am
Amazing!!! I am cheap as well and these actually look better than the ones online!! On my way to Home Depot now!! Nice Racks!! 😉
Tina Gutowski
July 16, 2012 at 11:19 am
That looks great!
Jason
July 29, 2012 at 11:16 am
Looks great ! Thanks ! I can’t find the pre-routed wall pieces nor the stair molding at any Home Depot or Dykes Lumber here in NYC… 😦 Ideas ?
steve beltzer
September 20, 2012 at 8:32 am
the rack look good and stylish too,Very nice i bought my car rack over here http://www.justsurfrax.com but is good to know that i can make my home rack awithout spending that much money
Adam
October 19, 2012 at 9:15 am
The particular Monday Blues” is a sense connected
with fear which starts its lineage each Weekend
evening and also directly into Monday a
. m ….. So listed here is a treatment for conquer the “Monday Blues” and for making
Monday an amazing begin to ones week Prefer to get no less than a number of enjoyable over the saturday
and sunday among the actual jobs. Intend to.
.. Using this method, about Monday morning hours, you’re not seeking frantically to your misplaced cellular phone, wallet, or maybe school/work USERNAME….. A different handle beating the actual Monday Morning Blues. Read this fabulous website precisely to be able to battle the “Monday Blues” and you will get the response. One does handle by yourself about weekends, thus observe how My partner and i may help you.
How to get over the Monday morning blues
April 9, 2013 at 8:45 pm
T-Rax surf racks will save you all the hassle of trying to build a rack.
They are made of metal and have a Lifetime Guarantee.
T-Rax Tom
February 25, 2014 at 2:04 pm
Awesome dude, thank you!! My husband and I are making some right now off of your directions! Thx!! 🙂
Chelle
July 9, 2014 at 7:07 pm
Today, I went to the beach front with my kids.
I found a sea shell and gave it to my 4 year old daughter and
said “You can hear the ocean if you put this to your ear.” She put the shell
to her ear and screamed. There was a hermit
crab inside and it pinched her ear. She never wants to go back!
LoL I know this is totally off topic but I had to tell someone!
lee mas
August 26, 2014 at 11:39 am
I did a bunch of research on building a DIY surfboard rack and I settled on your design, but while shopping in home depot for supplies I found these hangers that work perfectly for a surfboard rack. They aren’t quite as good looking, but are much cheaper than buying all the supplies and take much less effort to install. I currently have two pairs of the wavy ones in my apartment right now with a surfboard and three snowboards hanging on them. Thanks for the awesome DIY guide anyways though, maybe I’ll use it when I’ve got a more permanent living situation.
http://www.homedepot.com/p/Everbilt-Flip-Up-Heavy-Duty-Tool-Holder-01192/202305471
http://www.homedepot.com/p/Everbilt-Heavy-Duty-Flip-Up-Storage-Hanger-01195/202305470
Maybe you could post the links in your DIY guide so that people have another alternative for their surfboard rack needs 🙂
Ben
September 12, 2014 at 5:15 am
hello, how are you doing? We have a proven system for making money. There’s No Cost or Obligations…You decide if it’s right for you. For more info, visit our site at: http://nsurveyjk.WAYOFTHE.COM
Shaun Klingner
February 3, 2015 at 6:15 am
Clean your boards, that’s tackier loking
than those other racks
Paul Murray
July 16, 2015 at 8:21 am
Really well done! I took this page as an inspiration to organize my kids surfboards in the garage.. Wanted to send you a pic as I added a twist or two but don’t think I can add a picture. Regardless, it turned out great, thanks for the guidance!
Jon Chalfie
September 30, 2015 at 6:35 am
[…] Homemade Surfboard Rack | Read this stuff. It’s good … – Aug 06, 2010 · Homemade Surfboard Rack. … I realized that there wasn’t really anything out there to my liking. People make some really goofy/tacky looking … […]
How To Make A Surfboard Rack Out Of Pvc | Gogoodskh
May 22, 2016 at 10:02 am
[…] of a “surfboard display” than a rack, this creation from Johnny Side Burns is quite minimalist when compared to the other wall […]
9 Do It Yourself Surfboard Racks: How to Build Them Cheaply
October 3, 2017 at 9:18 am
[…] Here are the step-by-step instructions. […]
How to Store Your Surf and SUP Boards | StandUpPaddleBoardsReview
June 4, 2020 at 4:22 am
The pictures for the step by step do not appear for me. They would be helpful in understanding how you created your stand, which I agree… is better looking than most of what I’ve seen out there on the web!
MLR ATL
April 12, 2021 at 6:26 am
[…] Here are the step-by-step instructions. […]
Best Paddle Board Storage Racks (2024) & Storage Ideas for Your Surf and SUP Boards - SUP Scout
February 8, 2024 at 6:05 am